Using GrowthBook with Mixpanel
Using Mixpanel as a direct datasource is not advised and has been placed in maintenance mode. This is because because Mixpanel has placed JQL, their query language, in maintenance mode themselves. Therefore, our integration is limited and may unexpectedly break as they wind down support for JQL.
In order to ensure long term compatibility with GrowthBook and to receive the full set of features available in GrowthBook, we suggest you set up an export to a data warehouse following Mixpanel's documentation and then use that separate data warehouse (e.g. Snowflake, BigQuery) as your Data Source in GrowthBook.
Configuring GrowthBook to work with Mixpanel
GrowthBook supports Mixpanel as a data source for your A/B test reports.
1. Create a Service Account in Mixpanel
To add Mixpanel to GrowthBook you need to create a service account within Mixpanel.
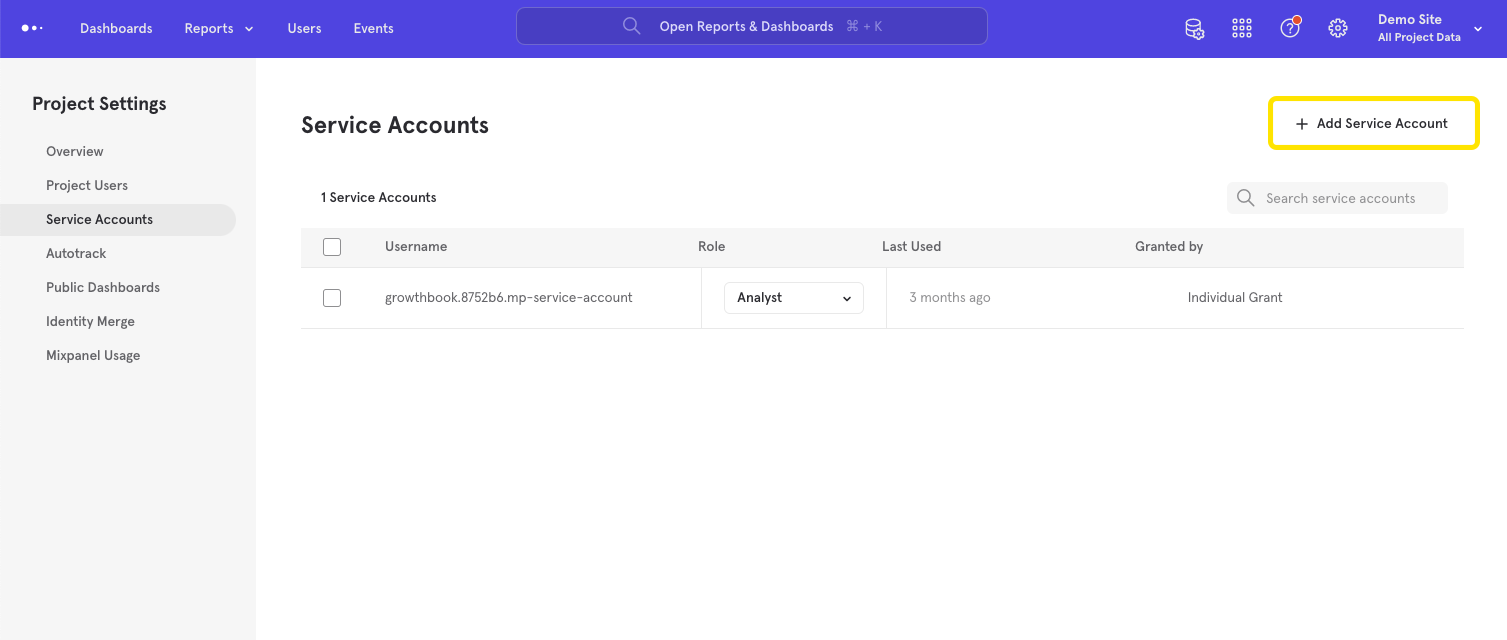
Click on the add service account. This account needs at least analysis permissions.
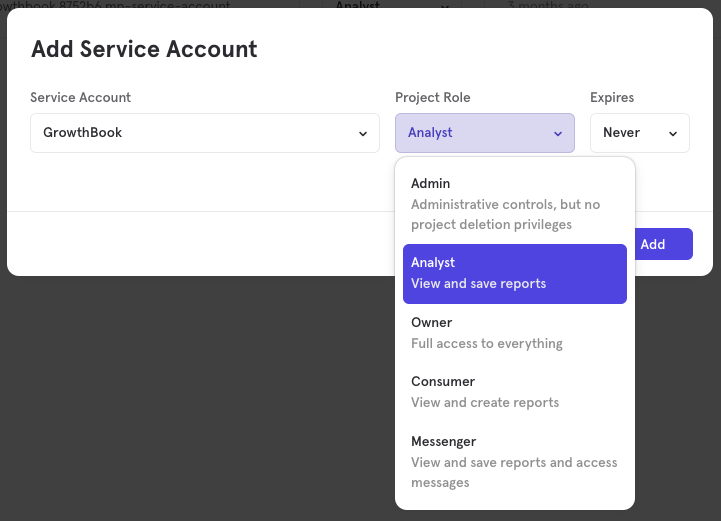
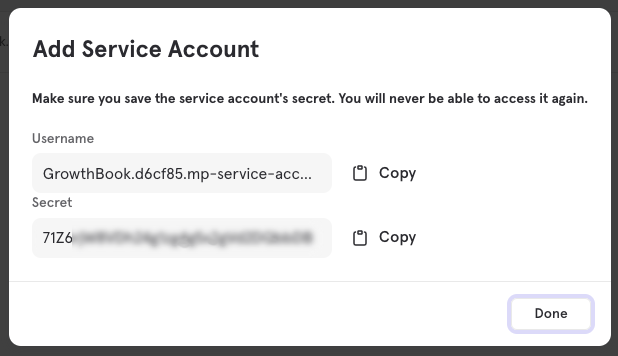
Once you crete the account, you'll get the username and secret. This is the only time you'll see this information, so it's best to leave this page up while you do the next step to add that connection information to GrowthBook.
2. Connect GrowthBook to Mixpanel
From the Analysis -> Data source section of the GrowthBook Platform, you can add a data source, and then choose Mixpanel from the avaliable options.
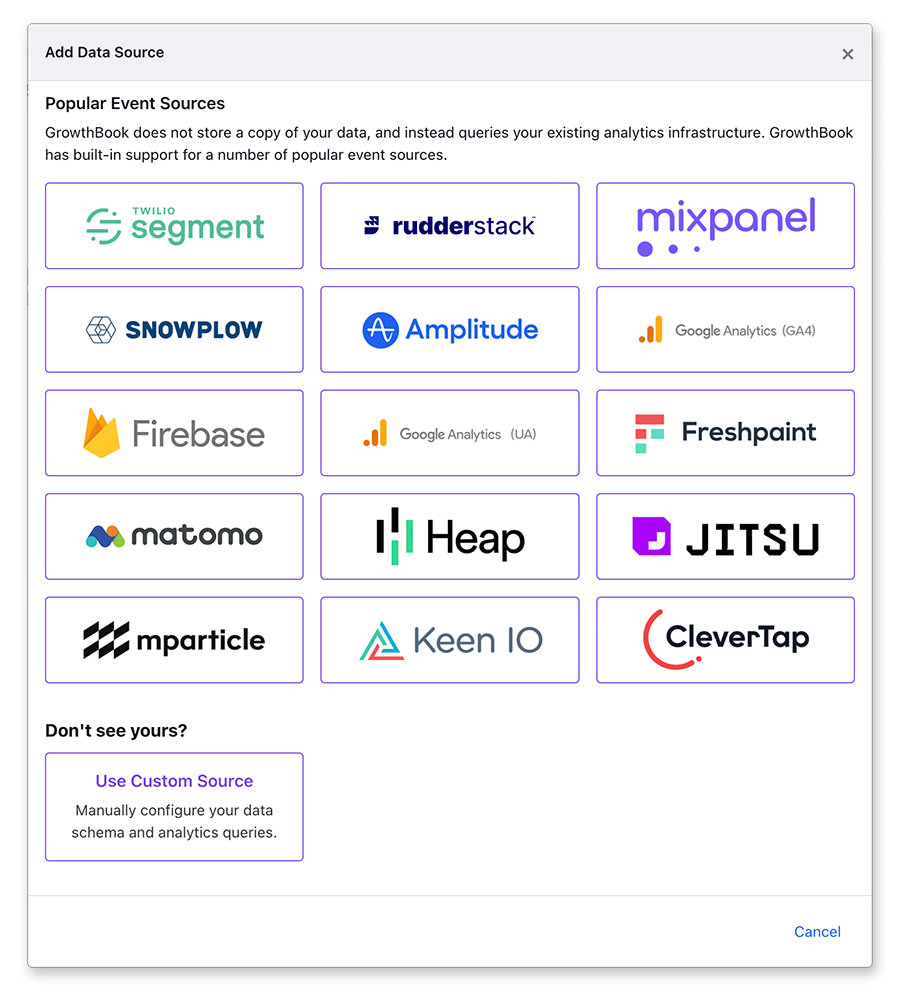
Then you'll be asked to enter your Mixpanel connection information:
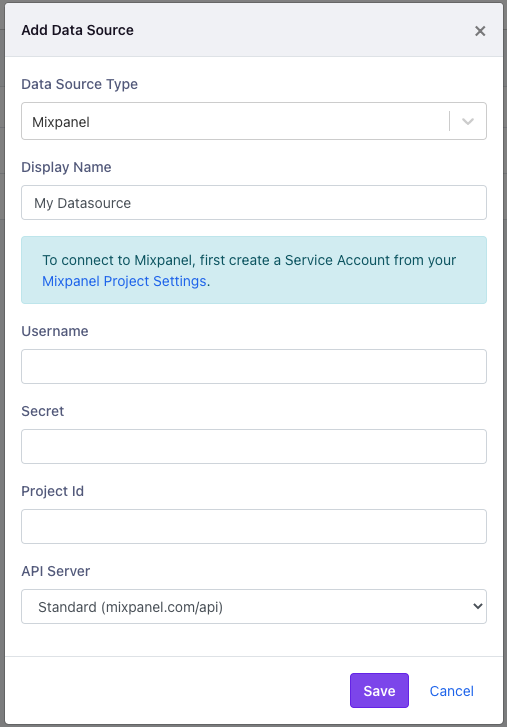
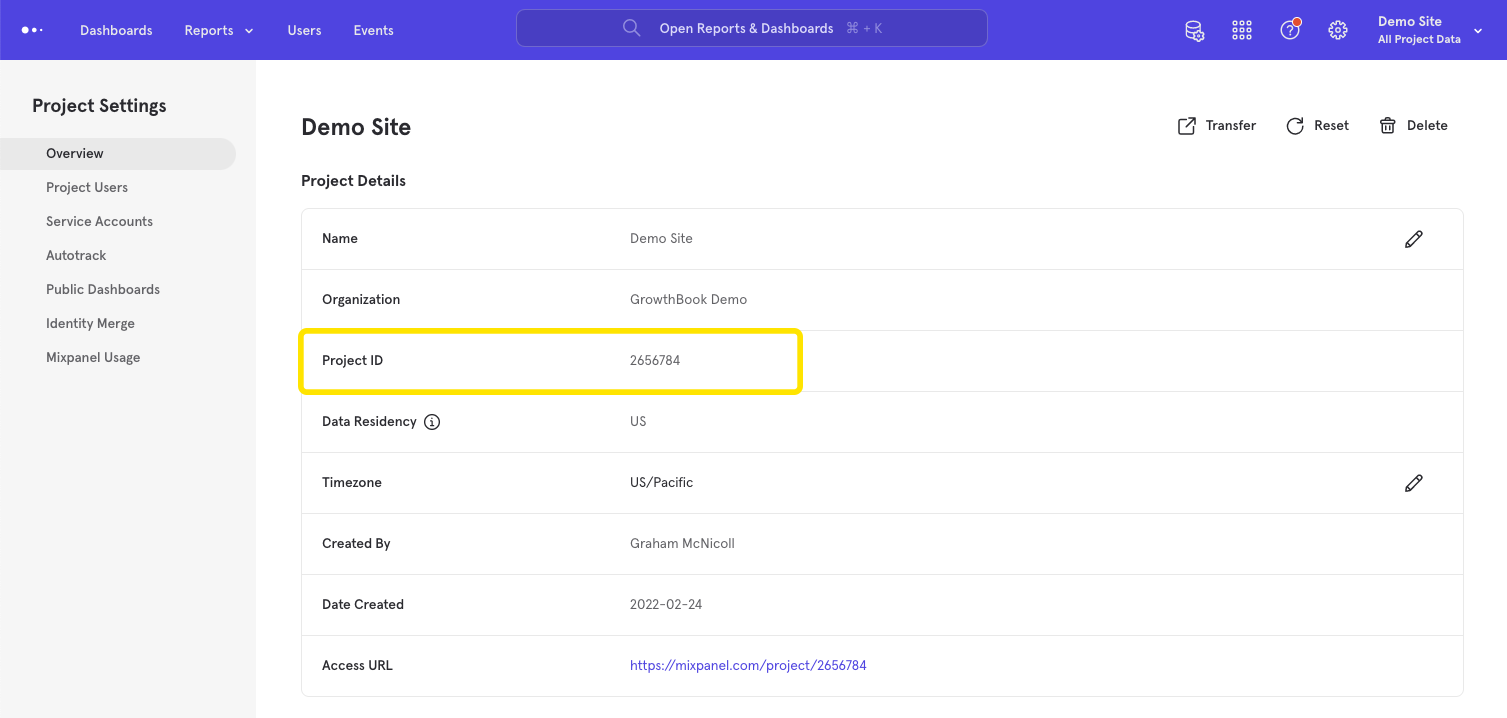
Add the mixpanel information from the previous step here. The other information you'll need is the project ID from
Mixpanel. You can find this in the the project settings overview from mixpanel
3. Experiment Tracking Information
After you successfully connect to mixpanel from GrowthBook you'll be asked to enter the experiment event information.
These values need to match the names you choose when sending the experiment exposure information to Mixpanel (see
step 4), but can be any values you choose. We suggest you use $experiment started, Experiment name and
Variant name as in the example below.
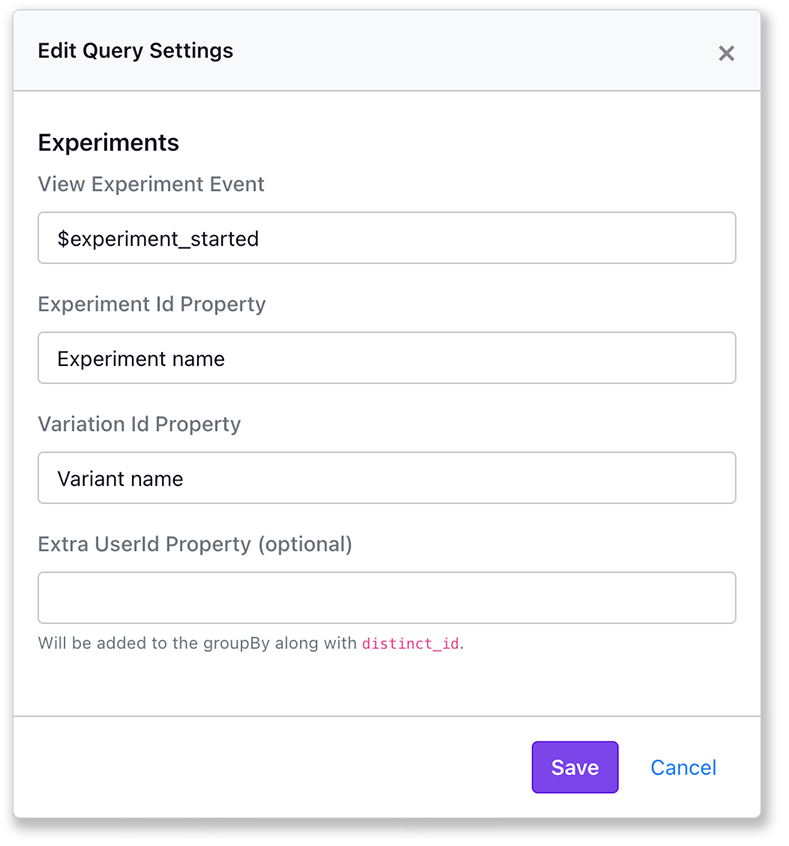
The naming here has to match the event names you pass with the SDK implementation (see step 4).
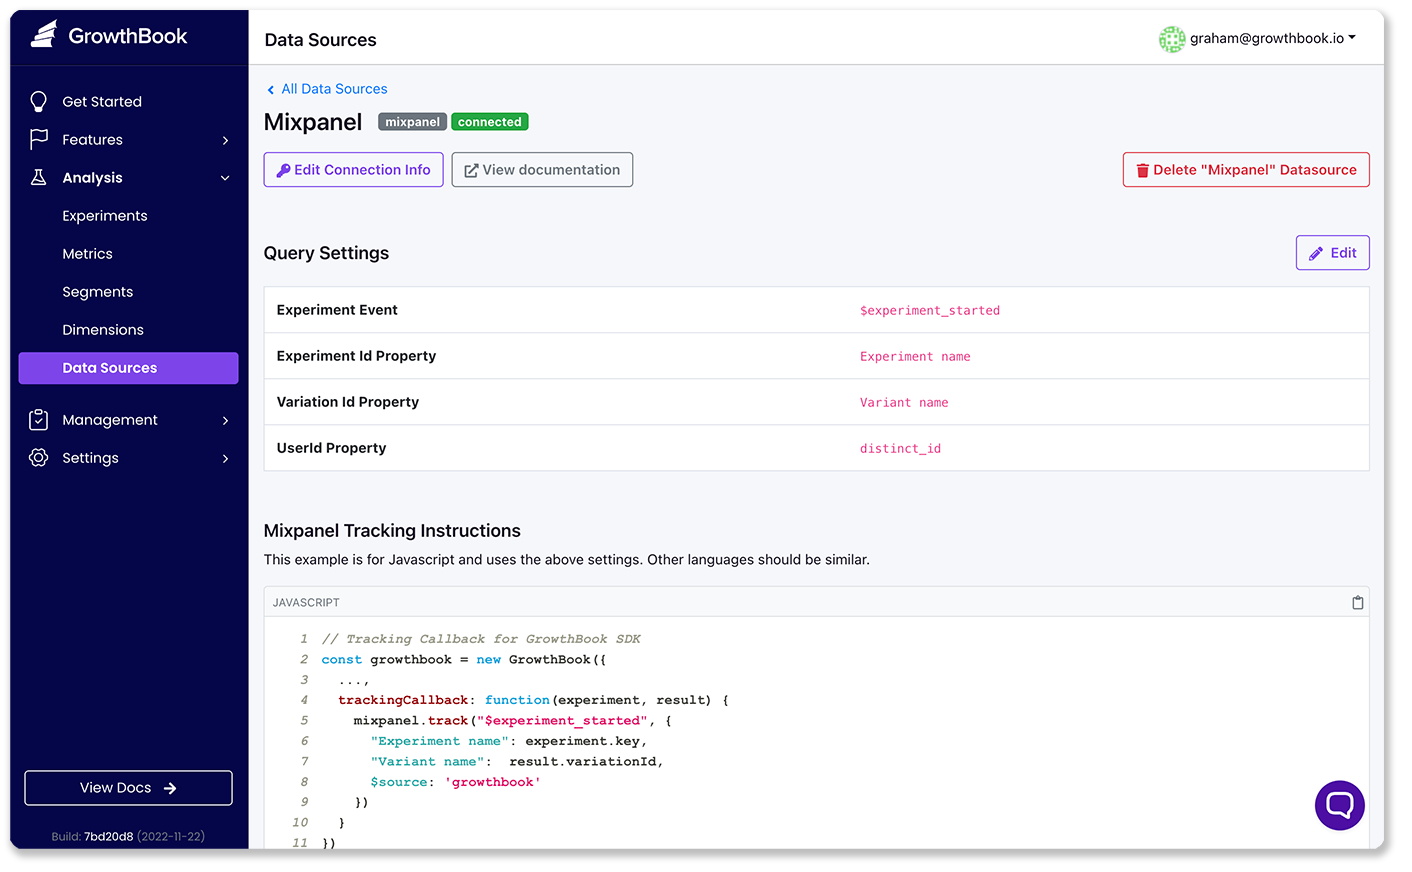
When you've successfully connected GrowthBook to your Mixpanel account, you'll see the experiment tracking information as well as sample code.
4. Implement GrowthBook SDK with Mixpanel
When implementing the GrowthBook SDK there are two things that are needed that are specific to Mixpanel: tracking to Mixpanel when a user is placed into an experiment, and adding the Mixpanel user ID to the list of user attributes. You can find the implementation of the GrowthBook SDKs in many languages, the implementation is similar for each. Shown below is the typescript version:
import mixpanel from "mixpanel-browser";

// Create a GrowthBook instance
const growthbook = new GrowthBook({
  trackingCallback: (experiment, result) => {
    mixpanel.track("$experiment_started", {
      "Experiment name": experiment.key,
      "Variant name": result.variationId,
      $source: "growthbook",
    });
  },
});

// Add the mixpanel user id to the GrowthBook attributes when it loads:
mixpanel.init("[YOUR PROJECT TOKEN]", {
  debug: true,
  loaded: function (mx) {
    growthbook.setAttributes({
      ...growthbook.getAttributes(),
      id: mx.get_distinct_id(),
    });
  },
});
The project token can be found in the Mixpanel Project Settings.

You will still need to implement the feature flagging side of GrowthBook, where the feature JSON is fetched and other user attributes defined. This implementation instructions can be found for each specific language.
By default, Mixpanel stores all events as UTC time, but can be changed per project. If the timezones between GrowthBook and your Mixpanel don't match, it can cause results to not show data for the correct time period.